Experimenting with Angular2 CLI
During the keynote of ng-conf 2016, Brad Green presented a lot of cool stuff about Angular2 and one of them was a tool called Angular-CLI. Angular-CLI contains a bunch of simple commands to make your work easier with Angular2 projects. The tool essentially streamlines and simplifies your projects. I am always cautious about this kind of tool because often they create far more than you need and pollute your project but when used wisely, they can be helpful.
To start playing with Angular-CLI first I had to install it. This tool is built with Node.js and it requires the node version 4 or greater. You can install this tool with the command:
npm install -g angular-cli
To create a new application I used the command: ng new SampleApp.
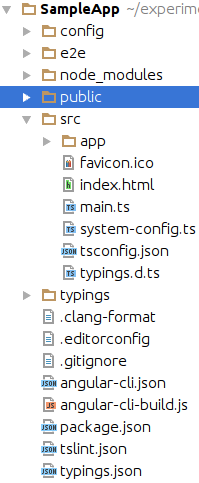
And the result I got was a working application with a folder structure like this:

As you can see, a lot is done after you run this command. You have not only your app ready to use but also ready to build. You can even run tests.
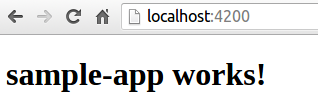
After installation, I executed ng build and ng serve which allows us to see under the URI http://localhost:4200/ in the following screen:

Next, I wanted to create a new route. I did this with the command ng generate route dashboard and I got the following output in the terminal:
installing route
installing component
  create src/app/+dashboard/dashboard.component.css
  create src/app/+dashboard/dashboard.component.html
  create src/app/+dashboard/dashboard.component.spec.ts
  create src/app/+dashboard/dashboard.component.ts
  create src/app/+dashboard/index.ts
  create src/app/+dashboard/shared/index.ts
This tool is smart enough to create folders prefixed with a + sign. It is required in order to have lazy loading of components. You can watch a talk given by Misko Hevery at ng-conf 2016 to find out a bit more about it.
You can use this command line tool to create services, modules, components, etc.
Next, I tried this tool to see how it deals with nested routes. I executed the command:
ng generate route dashboard/event-list
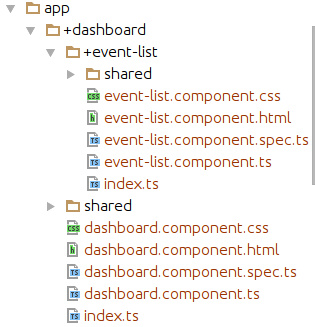
And it turned out that Angular-CLI deals with it pretty well. I got this structure of folders:

And the routing was created like this in dashboard.component:
@Routes([
 {path: '/event-list', component: EventListComponent}
])
And it was also changed in the sample-app.component to this:
@Routes([
 {path: '/dashboard/...', component: DashboardComponent},
 {path: '/main-page', component: MainPageComponent}
])
As you can see, this tool creates all the files needed for the component. These files are: a template file, a style file, a component file. It also generates a spec file where you have the scaffolding for testing your component.
The only drawback of this generation was the “…” ellipses at the end of the dashboard route. It didn’t work with the new router and I had to change the configuration to this:
@Routes([
  {path: '/dashboard', component: DashboardComponent},
  {path: '/main-page', component: MainPageComponent}
])
You can see the final result of me playing with Angular-CLI in this repository. I am sure that this drawback with the ellipses will be fixed soon and by the time you read this it could have already happened.
You can do a lot of things with this tool if you try it by yourself, as I have only touched the tip of the iceberg in this post. If you work with Angular2, for sure you should spend some time with this tool and discover what it can do for you.
Related posts:
- Enrolling in "Daj się poznać"
- "Daj się poznać" - Project details"
- I'm holding a Project Rider EAP
- Installing ASP .NET Core 1 on Ubuntu 14.04
- My first ASP NET Core 1.0 web application
- Project setup - server-side
- Project setup - client-side
- Adding styling to my application
- Angular 2 Confirm Dialog Component
- Before going into production
- Publishing to Azure
- Setting up the Web client for Google Identity Platform
- oidc-token-manager library with Google Identity Platform - Part 1
- oidc-token-manager library with Google Identity Platform - Part 2
- Accessing API with token from Google Identity Provider
- How portable is ASP .NET Core 1.0?
- When dotPeek can save your live
- Reading code as if it were a book
- ASP .NET Core Configuration
- Getting started with IdentityServer4
- IdentityServer4 - accessing API
- Dealing with secrets in ASP .NET Core
- Google Identity Provider with IdentityServer4
- Upgrading to Angular2 RC1
- Experimenting with Angular2 CLI
- Migrating to ASP .NET Core RC2
- Epilogue: Daj się poznać series

Comments
comments powered by Disqus