oidc-token-manager library with Google Identity Platform - Part 1
As I stated in this post, I am going to write a series of posts about auth stuff. This post will be the second in this series and I am describing my experiences trying to use the library oidc-token-manager to get tokens from the Google Identity Platform.
As I mentioned before, I want to have a single page application which gets tokens from Identity Provider and sends them to REST API to get access to resources.
To validate this solution, I was searching for a pure javascript library which allows me to get a token from OpenId Connect Identity Provider, refreshes this token (yes, even in implicit flow), gives me access to some information from it, stores this token and destroys it on my request.
I was looking for a library which fulfills my needs and I found one.
It is called oidc-token-manager. This library has everything what I want:
Redirects for token
Processes token
Removes token
Renews token
But this library is dedicated for IdentityServer which is a .NET implementation of protocols like OpenID Connect and OAuth2. I wanted to use it with Google not with IdentityServer, but Google Identity Provider is also compatible with OpenID Connect and OAuth2. There was hope and below I have written about how I verified this hope.
I didn’t use my Notifier project to test this library. I did this with a small sample application, so let’s jump right into it and see how it looked.
The library oidc-token-manager has a nice sample project in its repository. I used it as a starting point.
I created a new folder (mkdir NotifierDemo) and inside it I copied everything what was in
this folder.
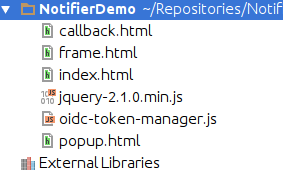
I removed all the stuff related to Visual Studio. My file structure looked like this in
WebStorm:

I needed a server to host my application and I decided to use a simple Node.js server called
http-server
but first I had to create a package.json file. I did this using npm init, after answering every question I had the file package.json inside my project.
Then I installed http-server and saved it as a development dependency using this command: npm install http-server --save-dev.
Then I added script dev to package.json so the scripts section looked like this:
"scripts": {
 "dev": "http-server -p 5000"
},
The option -p is a port on which the server will be running. I had to set this port to 5000 because I specified it for my client in the Google Developer Console.
Now I ready to start connecting my application with Google Identity Provider.
I started in the file index.html and his file has a config variable which contains the whole configuration for oidc-token-manager. I had the setting needed for this configuration in the file which I downloaded at the end of the previous post. This file looks like this:
{"web":{"client_id":"342665198077-tp56a5pab4ei5lri37nkba69b6sqghou.apps.googleusercontent.com","project_id":"notifierdemo-1268","auth_uri":"https://accounts.google.com/o/oauth2/auth","token_uri":"https://accounts.google.com/o/oauth2/token","auth_provider_x509_cert_url":"https://www.googleapis.com/oauth2/v1/certs","client_secret":"jDvSf78IkYDGEw9FI_gnXEnZ","redirect_uris":["http://localhost:5000/callback.html"],"javascript_origins":["http://localhost:5000"]}}
I took client_id which was in the property with the same name. I also changed scope in config and only left email in scope and I set authority property. At this stage, my config in index.html looked like this:
var config = {
    authority: "https://accounts.google.com",
    client_id: "342665198077-tp56a5pab4ei5lri37nkba69b6sqghou.apps.googleusercontent.com",
    redirect_uri: window.location.protocol + "//" + window.location.host + "/callback.html",
    post_logout_redirect_uri: window.location.protocol + "//" + window.location.host + "/index.html",
    response_type: "id_token token",
    scope: "email",
    silent_redirect_uri: window.location.protocol + "//" + window.location.host + "/frame.html",
    popup_redirect_uri: window.location.protocol + "//" + window.location.host + "/popup.html",
    silent_renew: true
};
I also set authority and client_id in the config variable in callback.html so it looks like this;
var config = {
    authority: "https://accounts.google.com",
    client_id: "342665198077-tp56a5pab4ei5lri37nkba69b6sqghou.apps.googleusercontent.com"
};
It seemed to me that I was ready, so I ran my application with the command npm run dev.
I navigated in the browser to http://localhost:5000 and I saw this:

I clicked on the Get Token button. And nothing happened. And then the investigation began. I opened a browser console and saw:

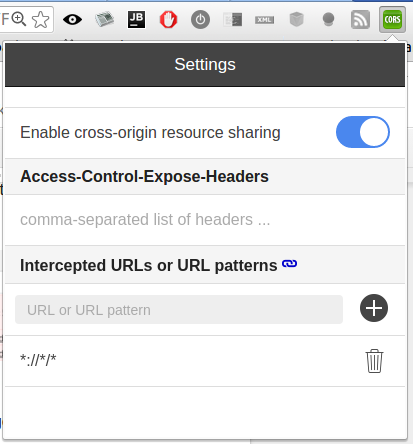
It’s a well known issue. You can read a lot about it on the Internet. To get rid of it quickly I used this chrome extension. This extension gave me a button which allows me to enable cross-origin resource sharing. This was a very ugly solution but for my testing purposes I accepted it.

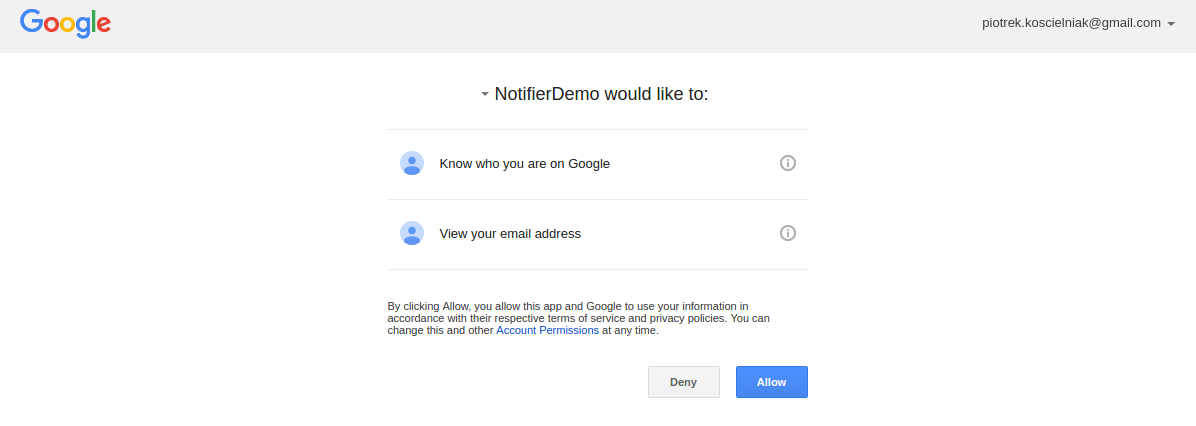
After enabling cross-origin resource sharing. I navigated to http://localhost:5000 again and I clicked on the Get Token button once more. And this time I got following screen:

After clicking Allow I got this screen:

After spending some time debugging, I finally got my answer. The library oidc-token-manager fetches metadata from a .well-known url. It is specified in the OpenID Connect Discovery 1.0 and in the case of Google, it looks like this https://accounts.google.com/.well-known/openid-configuration. The response from Google .well-known url provides among others this property:
"jwks_uri": "https://www.googleapis.com/oauth2/v3/certs",
From this url: https://www.googleapis.com/oauth2/v3/certs, oidc-token-manager fetches the necessary certificates to validate the tokens. This library assumes that the information about certs is provided as an object something like this:
{
  "keys": [{
    "kty": "RSA",
    "alg": "RS256",
    "use": "sig",
    "kid": "8087d258ac19c0fcf1dab7a908c221cdd81d5512",
“x5c”:["-----BEGIN CERTIFICATE-----\nMIIDJjCCAgwIBA… [removed for brevity] ...ZTRsIQWyJ4hUP\n-----END CERTIFICATE-----\n",
  "c8f37d70371587d2aaae3bbff624cc865ef10575": "-----BEGIN CERTIFICATE-----\nMIIDJjCCAg… [removed for brevity]  ...CAVCztq15Z\n-----END CERTIFICATE-----\n"
]
  }, {
    "kty": "RSA",
    "alg": "RS256",
    "use": "sig",
    "kid": "428489e3a6753680152ffcf1a8f7d0379f28ce9e",
    “x5c”:["-----BEGIN CERTIFICATE-----\nMIIDJjCCAgwIBA… [removed for brevity] ...ZTRsIQWyJ4hUP\n-----END CERTIFICATE-----\n",
  "c8f37d70371587d2aaae3bbff624cc865ef10575": "-----BEGIN CERTIFICATE-----\nMIIDJjCCAg… [removed for brevity]  ...CAVCztq15Z\n-----END CERTIFICATE-----\n"
] }]
}
But Google provides the following structure of information about certificates:
{
  "keys": [{
    "kty": "RSA",
    "alg": "RS256",
    "use": "sig",
    "kid": "8087d258ac19c0fcf1dab7a908c221cdd81d5512",
    "n": "pmYJZAbSY2L …[removed for brevity]... 9dQNxhFaixl4BgqjaP9onw",
    "e": "AQAB"
  }, {
    "kty": "RSA",
    "alg": "RS256",
    "use": "sig",
    "kid": "428489e3a6753680152ffcf1a8f7d0379f28ce9e",
    "n": "pqLUr6XU-Ut4z_JS- …[removed for brevity]... H1QWo8bs2SXo3w",
    "e": "AQAB"
  }]
}
The missing part is property x5c. In this property, there is a public key needed to validate the signature of the tokens. Google provides a modulus(n) and an exponent(e) RSA public key but library oidc-token-manager expects a PEM key which looks something like this:
"-----BEGIN CERTIFICATE-----\nMIIDJjCCAgwIBA… [removed for brevity] ...ZTRsIQWyJ4hUP\n-----END CERTIFICATE-----\n"
I also found that Google provides the following information in the header part of the JSON Web Token.
{"alg":"RS256","kid":"428489e3a6753680152ffcf1a8f7d0379f28ce9e"}
The property kid indicates which public key from https://www.googleapis.com/oauth2/v3/certs, should be used to validate the signature. As it is an array of keys, you must choose one. The library oidc-token-manager always takes the first one.
I managed to get access token from Google Identity Provider using library oidc-token-manager but I couldn’t validate its signature because of the format of the certs returned from Google but there must be a way to handle this kind of situation. However, I’ll write about this in the next post.
Related posts:
- Enrolling in "Daj się poznać"
- "Daj się poznać" - Project details"
- I'm holding a Project Rider EAP
- Installing ASP .NET Core 1 on Ubuntu 14.04
- My first ASP NET Core 1.0 web application
- Project setup - server-side
- Project setup - client-side
- Adding styling to my application
- Angular 2 Confirm Dialog Component
- Before going into production
- Publishing to Azure
- Setting up the Web client for Google Identity Platform
- oidc-token-manager library with Google Identity Platform - Part 1
- oidc-token-manager library with Google Identity Platform - Part 2
- Accessing API with token from Google Identity Provider
- How portable is ASP .NET Core 1.0?
- When dotPeek can save your live
- Reading code as if it were a book
- ASP .NET Core Configuration
- Getting started with IdentityServer4
- IdentityServer4 - accessing API
- Dealing with secrets in ASP .NET Core
- Google Identity Provider with IdentityServer4
- Upgrading to Angular2 RC1
- Experimenting with Angular2 CLI
- Migrating to ASP .NET Core RC2
- Epilogue: Daj się poznać series

Comments
comments powered by Disqus