Project setup - server-side
In this post, I am writing about how I set up the server-side of my project - Notifier.
The application will consist of REST API and Angular 2 single page application.
For now, both parts will be hosted in the same ASP .NET Core application.
To create this project I used yo aspnet generator.
If you want to find out how I installed these tools check out
this post.
I entered in terminal command yo aspnet and after this I saw the following output,
which gave me a choice of project type.
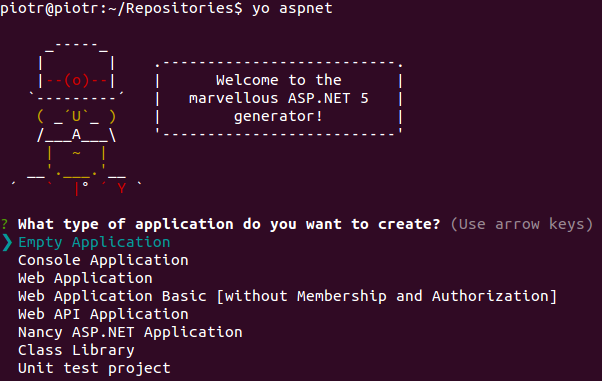
I chose empty project.
After this I was asked to enter the project name.
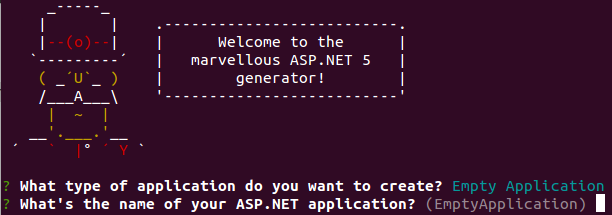
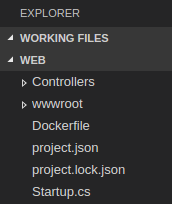
I typed Web. This name has an influence on the name of the folder which will be created when you hit enter. For the rest of this article this newly created folder will be referred to as the root of the project. When I opened this project in Visual Studio Code I could see the following structure of my project:
To be able to use Web API in my project I must import the following nuget package: Microsoft.AspNet.Mvc I did this by typing its name in project.json under the dependencies section. When you do this you can see a very nice intellisense which helps to choose the right package in right version.
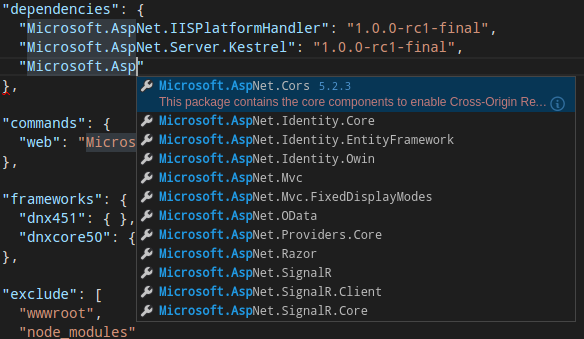
After this is what my dependency section looked like this:
"dependencies": {
     "Microsoft.AspNet.IISPlatformHandler": "1.0.0-rc1-final",
     "Microsoft.AspNet.Server.Kestrel": "1.0.0-rc1-final",
     "Microsoft.AspNet.Mvc": "6.0.0-rc1-final"
   },
The next thing which I did was issuing in terminal the command dnu restore.
I must be in the root folder of the project to issue this command. Actually,
Visual Studio Code shows at the top a strip with the button Restore which does exactly the same.

Then I changed my Startup file so it looks like this:
using Microsoft.AspNet.Builder;
using Microsoft.Extensions.DependencyInjection;

namespace Notifier.Web
{
    public class Startup
    {
        // This method gets called by the runtime. Use this method to add services to the container.
        // For more information on how to configure your application, visit http://go.microsoft.com/fwlink/?LinkID=398940
        public void ConfigureServices(IServiceCollection services)
        {
            services.AddMvc();
        }

        // This method gets called by the runtime. Use this method to configure the HTTP request pipeline.
        public void Configure(IApplicationBuilder app)
        {
            app.UseIISPlatformHandler();

            app.UseMvc();
        }

        // Entry point for the application.
        public static void Main(string[] args) => Microsoft.AspNet.Hosting.WebApplication.Run<Startup>(args);
    }
}
I added services.AddMvc(); in ConfigureServices method and app.UseMvc(); in Configure method.
At the occasion, I also hit CTRL+. And chose Remove Unnecessary Usings which did what it says.
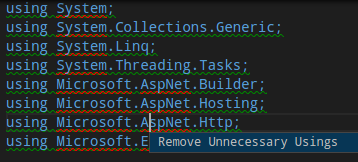
You may not know but MVC and Web API are now unified in ASP.NET Core 1.0.
There’s no need to import something special for Web API.
Then it was time to create first the WebApi controller.
Inside the root of my project I created a folder Controllers (mkdir Controllers),
and my goal was to create a dummy API controller inside it.
I achieved my goal using yo aspnet generator.
Firstly, I navigated to the newly created Controllers folder and then
I used the command yo aspnet --help in it. That command showed me how
I can create a WebApi controller.
It turned out that there is command yo aspnet:WebApiController.

I executed it in terminal passing ValuesController as the name of my controller.
yo aspnet:WebApiController ValuesController
This command added file ValuesController.cs inside my Controllers folder.
And inside this file was the following code:
using System;
using System.Collections.Generic;
using System.Linq;
using System.Threading.Tasks;
using Microsoft.AspNet.Mvc;

// For more information on enabling Web API for empty projects, visit http://go.microsoft.com/fwlink/?LinkID=397860

namespace notifier.Controllers
{
    [Route("api/[controller]")]
    public class ValuesController : Controller
    {
        // GET: api/values
        [HttpGet]
        public IEnumerable<string> Get()
        {
            return new string[] { "value1", "value2" };
        }

        // GET api/values/5
        [HttpGet("{id}")]
        public string Get(int id)
        {
            return "value";
        }

        // POST api/values
        [HttpPost]
        public void Post([FromBody]string value)
        {
        }

        // PUT api/values/5
        [HttpPut("{id}")]
        public void Put(int id, [FromBody]string value)
        {
        }

        // DELETE api/values/5
        [HttpDelete("{id}")]
        public void Delete(int id)
        {
        }
    }
}
Note that you should not typed extension .cs. Generator adds this for you.
That was enough for me to test that I had the server side part of my application already working.
To be sure about it, I had to run my application. I entered in terminal the command cd .. because
I was still in the Controllers folder and you can start your application only from a root
folder of your project and in this root folder I issued the command dnx web and
I got the following output in terminal:
Hosting environment: Production
Now listening on: http://localhost:5000
Application started. Press Ctrl+C to shut down
It seemed that everything was okay. This is how it looked when I did a get request under url http://localhost:5000/api/values using Postman.

What dnx web command does you can check in the file project.json in the section commands.
 "commands": {
    "web": "Microsoft.AspNet.Server.Kestrel"
  },
As you can see web is an alias for Microsoft.AspNet.Server.Kestrel. This is a cross platform server which is used to run ASP .NET Core applications. I’ll write more about ASP .NET Core during my series, but for now the setup of my Project’s server side is finished.
Yes, there’ll be more things to set up in the future but for now I don’t need them as I am happy with everything I have now. Now I can start to set up my client-side.
Related posts:
- Enrolling in "Daj się poznać"
- "Daj się poznać" - Project details"
- I'm holding a Project Rider EAP
- Installing ASP .NET Core 1 on Ubuntu 14.04
- My first ASP NET Core 1.0 web application
- Project setup - server-side
- Project setup - client-side
- Adding styling to my application
- Angular 2 Confirm Dialog Component
- Before going into production
- Publishing to Azure
- Setting up the Web client for Google Identity Platform
- oidc-token-manager library with Google Identity Platform - Part 1
- oidc-token-manager library with Google Identity Platform - Part 2
- Accessing API with token from Google Identity Provider
- How portable is ASP .NET Core 1.0?
- When dotPeek can save your live
- Reading code as if it were a book
- ASP .NET Core Configuration
- Getting started with IdentityServer4
- IdentityServer4 - accessing API
- Dealing with secrets in ASP .NET Core
- Google Identity Provider with IdentityServer4
- Upgrading to Angular2 RC1
- Experimenting with Angular2 CLI
- Migrating to ASP .NET Core RC2
- Epilogue: Daj się poznać series

Comments
comments powered by Disqus